Lowlights: Depth and Dimension Guide
Master the lowlights hair technique step by step: darker strands that add depth and dimension, break up the monotony, and create multidimensional blondes.
Blendsor
Blendsor Team
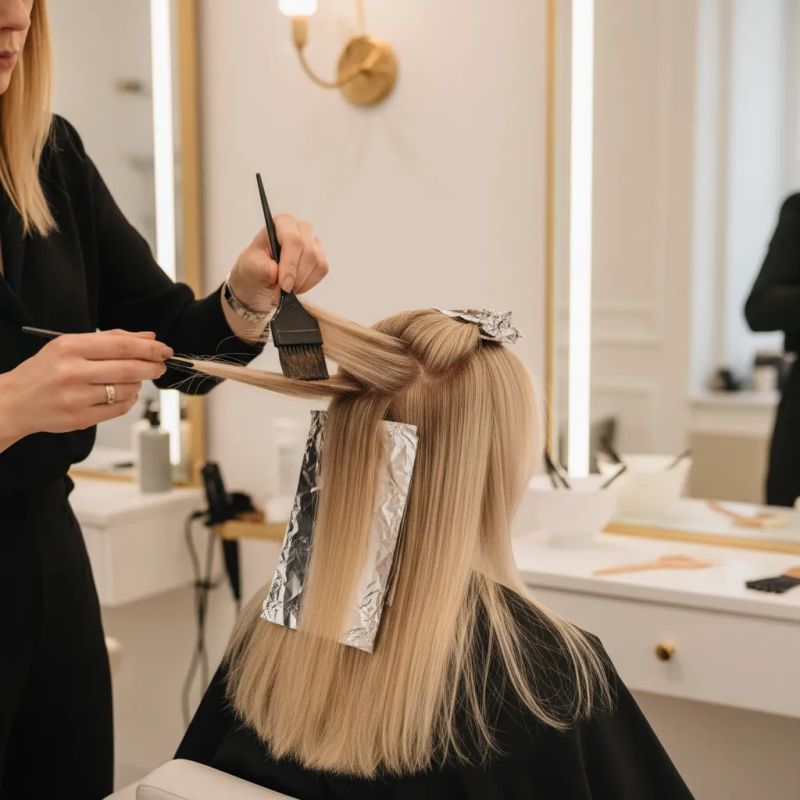
Do your blonde clients complain that their color looks “flat,” lifeless, like a uniform block? Or do you have clients who want to disguise their gray hair naturally without committing to full coverage?
Lowlights are strands colored darker than the base that add depth, dimension, and movement. They’re the natural complement to highlights and a technique worth mastering in any salon.
In this guide, you’ll learn what they are, how to apply them step by step, formulas for different objectives, and the mistakes to avoid. This article is part of our complete guide to professional coloring techniques.
Quick summary: Lowlights are strands colored darker than the base, with no bleach. They add depth to flat blondes and help disguise scattered grays. Are lowlights permanent? It depends on the product: with permanent color they don’t wash out, they grow out; with a demi-permanent they fade over time. They’re less damaging than bleached highlights, but they’re still oxidative color, and on pre-lightened hair the real risk is different: a strand that turns dark, flat, or greenish.
What Are Lowlights and Why Do They Work?
Lowlights are strands colored darker than the base color. Unlike highlights (which lighten), they darken strategic sections in shadow zones (nape, inner layers, under the crown) to create depth, dimension, and movement. They’re done with permanent or demi-permanent oxidative color, no bleach required.
It’s a matter of perception, not chemistry: the sense of depth comes from contrast. When all the hair sits at the same level, the eye reads it as flat. Alternate lights and darks and you get the illusion of volume and movement, and the hair looks fuller.
Characteristic Results
- Real dimension: Hair appears thicker and fuller
- Breaks monotony: Eliminates the “helmet” effect of uniform color
- Natural depth: Mimics how hair grows naturally
- Disguises gray: Integrates it into the overall tonal variation
When to Choose Lowlights
| Situation | Lowlights? |
|---|---|
| Blonde that looks flat or lifeless | Yes |
| Wants to disguise gray without full coverage | Yes |
| Balayage too uniform at the ends | Yes |
| Over-processed blonde that needs an “anchor” | Yes, with a strand test, and a filler if the strand goes much darker |
| Dark base that wants to go lighter | No (highlights better) |
| First color service | Depends on objective |
How to Apply Lowlights Step by Step?
Lowlights follow six steps: assess porosity and current level, prepare a darker shade with the deposit-only developer your line specifies, place strategically in shadow zones (nape, inner layers), weave selectively while alternating untreated sections, process according to the color’s instructions while watching porosity, then rinse and finish with gentle shampoo and conditioner.
The lowlights technique is similar to traditional highlights, but with some key differences in formulation and placement.
Step 1: Evaluation and Consultation
Before starting, analyze your client’s hair:
- Current level: Is it natural blonde, bleached, or dyed?
- Porosity: Porous hair absorbs more pigment
- Distribution: Where does the hair need more depth?
- Objective: Subtle dimension or visible contrast?
Two tests before any color: an allergy test 48 hours ahead, following the color manufacturer’s instructions, and that includes demi-permanents mixed with a developer (how to schedule it without losing the booking is covered in the 48-hour patch test guide). The second, a strand test, is for when there’s already bleach, highlights or previous color in the mix: on pre-lightened hair, a lowlight can come out darker or duller than the swatch promises, and that’s better discovered in a single foil. If that strand is heavily lightened, run an elasticity test on it before deciding whether it takes color today.
Step 2: Product Preparation
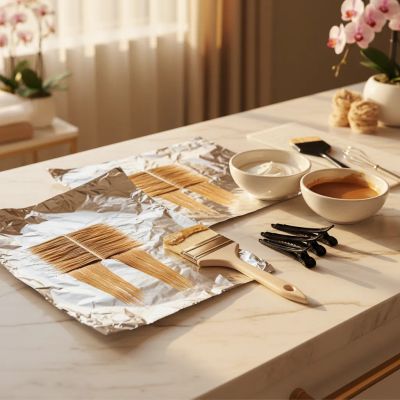
Lowlights don’t require bleach. They’re done with oxidative color: permanent, or demi-permanent if you want a result that fades with shampooing.
Base formula for lowlights:
Shade: darker than the base, in the chosen tone
Developer: the deposit-only strength your line specifies
Ratio: whatever that same line specifies
Two Wella examples show that every range has its own rule. When working at the same depth or darker, Koleston Perfect (permanent) mixes 1:1, and its usage leaflet (Wella PDF) lists Welloxon Perfect 4% (13 vol) on natural hair with no gray coverage needed, or 6% (20 vol). Color Touch (demi-permanent, no ammonia) mixes 1:2 with its own emulsion; for going darker, its leaflet lists the 1.9% (the 4% is kept for extra vibrancy, gray blending and coarse hair). And a semi-permanent with no developer, such as Color Fresh from the same company, is ready to use: it doesn’t need to be mixed with anything.
The choice between permanent and demi-permanent depends on how long you want the contrast to last and on the condition of the hair.
Step 3: Strategic Placement Pattern
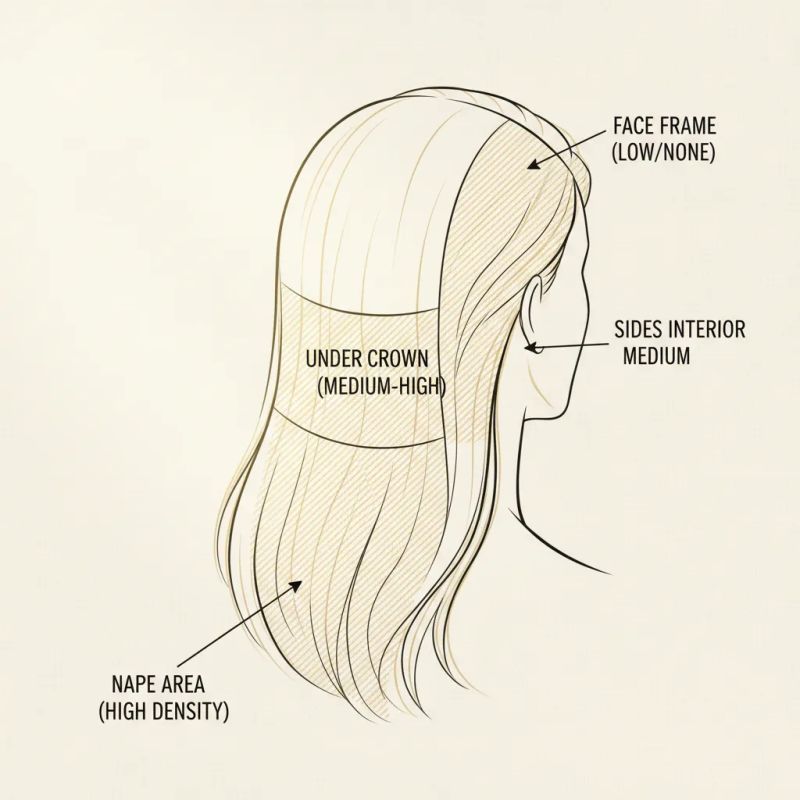
Unlike highlights that concentrate in natural light zones, lowlights are placed in shadow zones:
| Zone | Density | Objective |
|---|---|---|
| Nape | High | Depth in less visible area |
| Under crown | Medium-high | Contrast when hair moves |
| Sides (interior) | Medium | Dimension in inner layers |
| Face frame | Low or none | Maintain light around face |
| General roots | Variable | Simulate natural depth |
Key rule: Less is more. Too many lowlights can darken the overall result.
Step 4: Application Technique
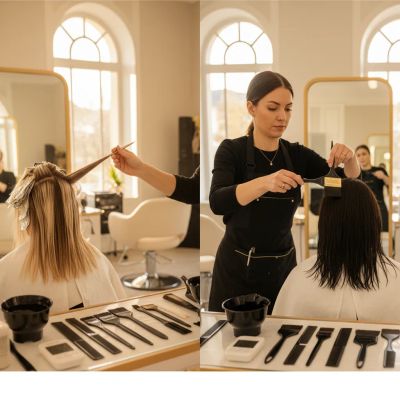
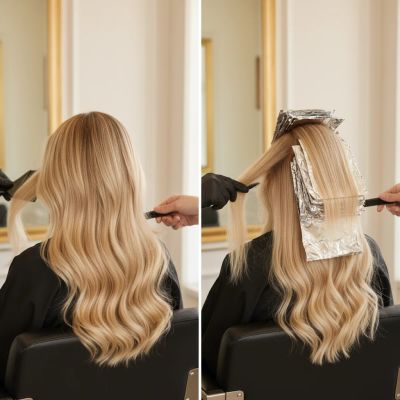
- Section the hair into panels (nape, sides, crown)
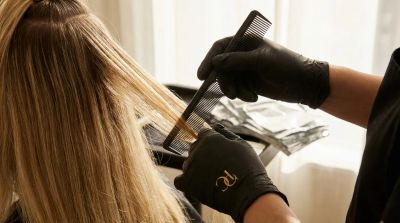
- Selective weave: Take fine to medium strands
- Place foil underneath
- Apply dye from roots toward mids (not always ends)
- Close foil without pressing
- Alternate with untreated sections
Step 5: Processing Time
Timing comes from the instructions of the color you’re using. As a reference, for a full-head application at the same depth or darker, Wella gives Koleston Perfect 30-40 minutes without heat and Color Touch 20 minutes; neither leaflet gives a separate time for foils.
What the instructions can’t see is the fiber in front of you. The Spanish IGORA ROYAL technical manual (Schwarzkopf PDF, in Spanish, p. 26) puts it in one line: porous hair absorbs more color, and the result can come out darker than intended. On pre-lightened strands, open a foil halfway through and check. If it’s already darker than you wanted, take those foils out and rinse them now: that stops it going any further, though rinsing won’t lift what has already gone dark. To stop it happening again, change the formula. In its protocol for taking lightened hair darker, the same manual (p. 28) advises choosing the permanent shade one level lighter than the target, or at the same level, depending on the condition of the hair. That’s its way of avoiding a darker end result, and the strand test tells you beforehand whether you chose right.
Step 6: Rinse and Finish
- Remove foils when color has developed
- Emulsify with lukewarm water
- Wash with gentle shampoo
- Condition mids and ends
- Evaluate result when dry to see true contrast
How to Formulate Lowlights by Level and Objective?
On a natural blonde, the formula is mostly a choice of tone: natural for a neutral shadow, gold or beige if you want it to follow the warmth of the base. On a pre-lightened blonde the chemistry changes: taking a porous strand darker with a cool tone and no pigment put back is the shortest route to a muddy lowlight. And on a brunette with early grays, the lowlight doesn’t cover the gray: it surrounds it with shadow.
Codes are left out on purpose. A tone number only makes sense inside its own chart: the 8 is pearl in Koleston Perfect and red in IGORA ROYAL, so carrying it from one brand to another can flip the direction of the color. Look up the tone in your line’s chart.
For Natural Blondes Who Want Dimension
Objective: Add subtle depth
Lowlight:
- Shade: darker than the base, keeping the gap small the first time
- Tone: natural, or gold/beige if the base is warm
- Developer and timing: as in steps 2 and 5
Contrast can always go up at the next visit; lifting out a strand that went too dark is a much bigger job.
For Bleached Blondes Who Look Flat
Objective: Break monotony without the strand turning muddy
This is the tricky one. The Spanish IGORA ROYAL technical manual (p. 28) explains that when you color to the natural level or darker after pre-lightening, lightening, or highlights, porous hair quickly loses the small red-orange pigments and soaks up the cool ones, leaving it dark, matte, muddy or, in the worst case, green. An ash put straight onto a bleached blonde walks right into that problem.
Lowlight:
- Tone: avoid a cool tone on its own; if you choose a warm one, expect it may fade sooner on porous hair
- If the target is much darker than the strand: fill first
- Always: strand test before the whole head
How much is “much”? Wella puts it in writing in a color correction guide on its US professional store: it recommends filling when the target level is more than two levels darker than the starting level. How to replace that missing base, step by step, is covered in the guide to pre-pigmentation when going darker.
To Disguise Early Grays in Brunettes
Objective: Integrate grays into tonal variation
Lowlight:
- Where: in zones with no gray, to build contrast around it
- Tone: the base's own (natural if neutral, gold if warm)
- Developer: same as the base formula (step 2)
If the goal is for the gray to stop showing, that’s coverage, and it’s formulated differently: see the gray hair coverage guide.
Lowlights in Warm vs Cool Tones
| Objective | Tone | What to watch |
|---|---|---|
| Warm dimension | Gold, copper | On porous hair, red-orange pigments leave sooner |
| Cool dimension | Ash | On bleached hair with no filler, this is the one that goes muddy: dark, matte, or greenish |
| Neutral natural | Natural | The most neutral option on a natural blonde; on bleached hair, it also needs a base if it goes much darker |
To better understand tone interactions, see our article on how to neutralize unwanted tones.
Lowlights vs Highlights: When to Use Each?
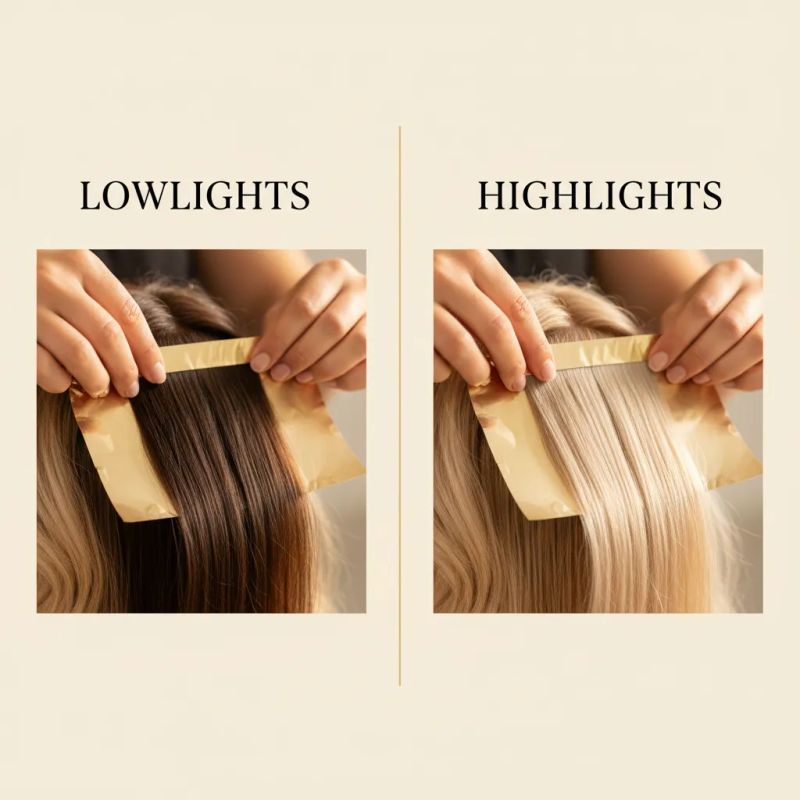
Lowlights darken with color, no bleach, and suit flat blondes or disguising scattered grays. Highlights lighten with bleach and suit darker hair wanting brightness. The most dimensional results combine both: highlights at the crown and face frame, lowlights at the nape and inner layers.
The short version:
| Factor | Lowlights | Highlights |
|---|---|---|
| Action | Darken strands | Lighten strands |
| Product | Color, no bleach | Bleach |
| Objective | Depth, dimension | Light, brightness |
| Ideal for | Flat blondes | Darker hair wanting light |
The full comparison, including when to choose each technique, is in highlights vs lowlights: key differences.
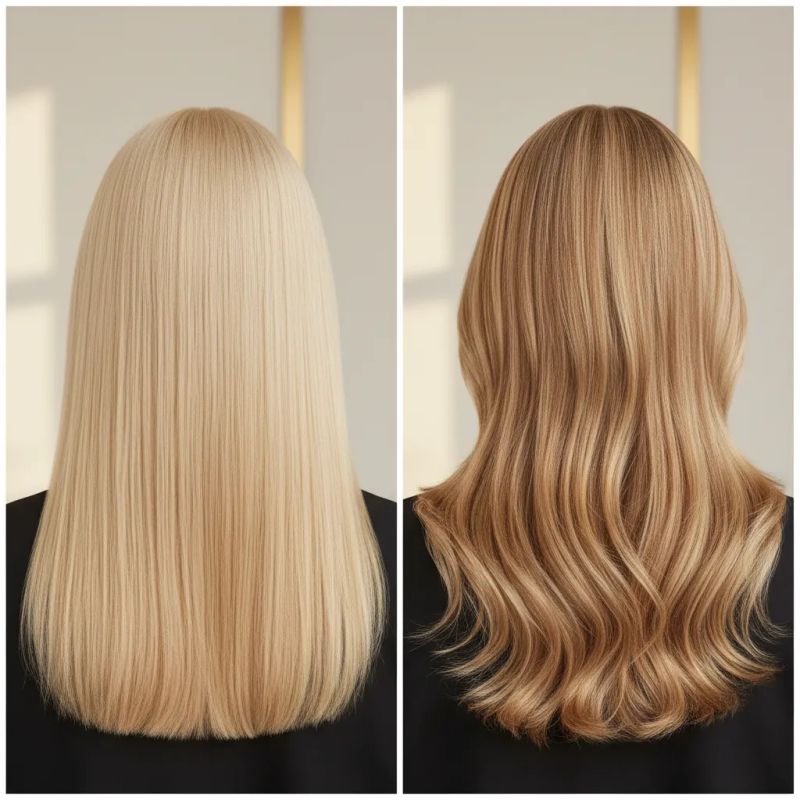
The Perfect Combination: Highlights + Lowlights
A multidimensional color combines both techniques:
- Highlights in natural light zones (crown, face frame)
- Lowlights in shadow zones (nape, inner layers)
This combination creates a three-dimensional effect that neither technique achieves alone. See our guide on balayage vs traditional highlights for more details on combinations.
What Are the Best Combinations with Lowlights?
Lowlights pair well with three key techniques: with balayage, adding root depth when the gradient looks flat; with babylights, creating a three-dimensional blonde that balances light and shadow; and with partial gray coverage, integrating scattered grays into tonal variation rather than covering them completely.
Balayage + Lowlights
When balayage needs more depth:
- Existing balayage on mids and ends
- Lowlights at roots and upper mid-section
- Result: Gradient with dimension, not a “dry ends” effect
Babylights + Lowlights
For blondes who want subtle dimension:
- Babylights for brightness and light
- Lowlights to anchor and add body
- Result: Dimensional blonde, not flat or “helmet-like”
To master babylights, visit our guide on babylights natural technique. And if the starting point is a blonde that looks flat, the dimensional blonde guide covers how to distribute light and shadow across the whole head.
Gray Coverage + Lowlights
Alternative to full coverage:
- Partial coverage in more concentrated areas
- Lowlights to integrate grays into overall variation
- Result: Grays blended into the play of lights and darks, not a single flat block of color
What Are the Most Common Lowlight Mistakes and How to Avoid Them?
The five most damaging mistakes are: jumping too many levels at once (streaks that look like dirt), placing lowlights on the face frame (a dirty look, since they belong in shadow zones), formulating the same way for virgin and bleached hair (bleached strands respond differently), taking product all the way to the ends on damaged hair, and applying on consecutive sections without any untreated gaps.
1. Lowlights Too Dark
The mistake: Jumping too many levels below the base at once.
The consequence: Dark streaks that look like dirt, not dimension.
The solution: Start with a small gap and build contrast at the next visit if needed. On bleached hair, if the target is much darker, fill first (see the formulas section).
2. Concentrating in Visible Zones
The mistake: Placing lowlights on face frame and crown.
The consequence: “Dirty” effect in the most visible areas.
The solution: Lowlights go in shadow zones: nape, under crown, inner layers.
3. Not Considering Porosity
The mistake: Formulating the same way for virgin hair as for bleached.
The consequence: Lowlights that turn almost black, flat, or greenish on porous hair.
The solution: Fit the formula to the fiber. On bleached hair, don’t leave the lowlight to an ash on its own: fill if the strand goes much darker, and confirm it with a strand test. How to read porosity before you formulate is covered in hair porosity and coloring.
4. Lowlights to the Ends on Damaged Hair
The mistake: Taking product all the way down on dry ends.
The consequence: Ends that absorb too much and become very dark.
The solution: If the ends are more porous than the rest, leave them out of the first pass and let the strand test decide whether they get product.
5. Not Alternating with Clean Sections
The mistake: Doing lowlights on consecutive sections.
The consequence: Entire dark areas without contrast.
The solution: Leave untreated sections in between. The more you leave, the subtler the contrast.
Frequently Asked Questions
How Long Do Lowlights Last? Are They Permanent?
It depends on the product. With permanent oxidative color, the color doesn’t wash out: it stays in the strand, and what moves is the regrowth, which comes in at the natural color. The smaller the gap between the lowlight and the base, the less that regrowth shows. With a demi-permanent or a semi-permanent, the color fades a little with every shampoo; Wella’s pitch for Color Touch Plus is intense results without the commitment of a permanent. And on bleached or porous hair, even with permanent color, warm tones can leave sooner: the IGORA ROYAL manual (p. 28) explains that this fiber quickly loses its red-orange pigments.
Are Lowlights Damaging to Hair?
Less than bleached highlights, because they don’t lighten. But they aren’t harmless: a permanent, or a demi-permanent with its developer, is still oxidative color. On hair that’s already bleached or heavily processed there’s a second risk, a strand that ends up dark or dull, which is why the strand test rules there: it also shows you how that fiber responds.
Can You Do Lowlights on Dyed Hair?
Yes, and it’s one of the best applications. Uniformly dyed hair benefits greatly from lowlights to break monotony. Just make sure the lowlight tone is compatible with the existing dye.
Lowlights or Full Color to Disguise Grays?
Lowlights work when the grays are scattered: they create tonal variation where the gray blends in as part of the pattern, without covering it. When the goal is for the gray to stop showing, that’s coverage, and shade charts such as Koleston Perfect, Majirel, or IGORA ROYAL adjust the mix to the amount of gray: see the gray hair coverage guide. And if the idea is to blend the gray into the color without a regrowth line, look at French blending.
In Summary
Lowlights are an essential tool for creating real dimension in hair:
- Break monotony: Transform flat blondes into vibrant blondes
- Disguise grays: Without the commitment of full coverage
- No bleach: Though they’re still oxidative color, with the tests that come with it
- Complement other techniques: Ideal with highlights, balayage, or babylights
Lowlights come down to craft: choosing the tone for the fiber, filling when it’s needed, and placing shadow where it adds. When they’re done well, nobody sees the individual strands; they see a blonde with more body and movement.
Want to calculate precise formulas for lowlights and other techniques? Use the hair color mixing calculator to verify the resulting tone before applying. Try Blendsor. The AI analyzes your client’s hair and suggests optimal formulation based on their current level and desired result.
This article is part of our complete guide to professional coloring techniques. Explore other techniques like babylights, foilyage, and balayage.
What's the difference between lowlights and regular dark highlights?
In the app, we ask you a question like this one, but about your own client.
Up for this week’s case? → More on highlights and techniques →Related articles
Practice with our colorimetry tools
Calculators, neutralization wheel, AI consultation...
The Blendsor newsletter
Color techniques and trends for professionals. No spam.
A client in the chair right now?
The Blendsor advisor gives you the precise formula for this technique with your salon's brands — and saves it to your client's card.
Ask about your caseWritten by the Blendsor team
Professional hair colorimetry experts with experience in AI-assisted formulation. We combine color science, salon practice and technology to help colorists formulate with precision.