Foiled Cashmere: The Full Foil Technique Reviving 90s Blonde
What foiled cashmere is and how the technique works: precision foil placement, layered toning, pre-service tests and how it differs from a classic balayage.
Blendsor
Blendsor Team
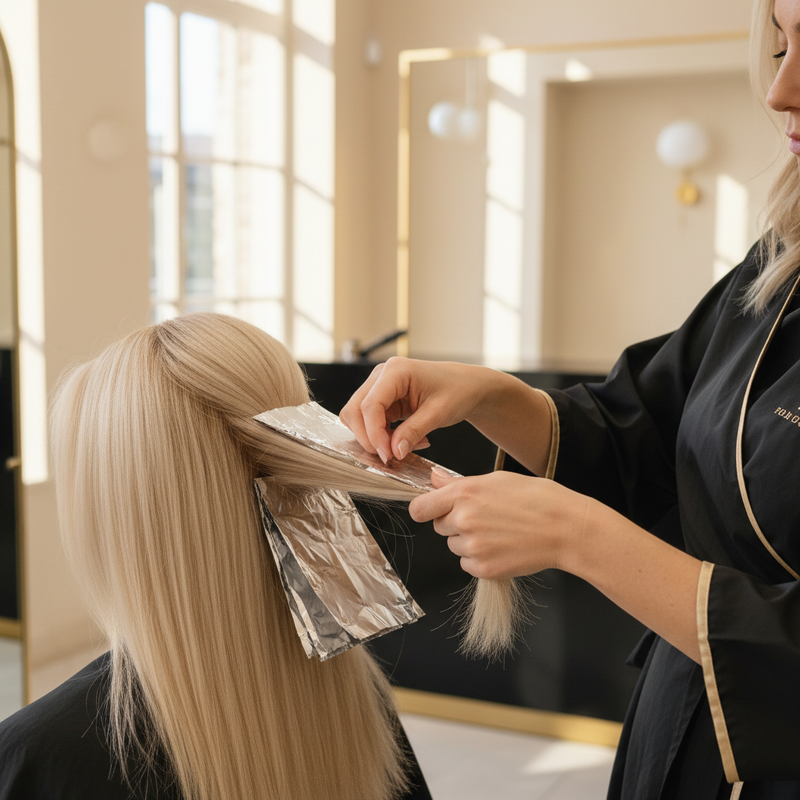
Does your client show up with a photo of a uniform, luminous blonde with no visible roots or chunky highlights, and you suggest a balayage?
If you’re a professional colorist, you know that moment. The client wants a clean blonde from root to tip: no gradients, no variation. The technique you need isn’t balayage: it’s a full foil. More specifically, what 2026 calls foiled cashmere.
According to Behind The Chair, in an article sponsored by Schwarzkopf Professional, foiled cashmere is the biggest luxury blonde trend of 2026. It’s not a new shade: it’s the return of the full-head foiling of the 90s, with today’s chemistry. This article is part of our hair color trends guide.
Quick summary: Foiled cashmere is a full-head foiling technique that Schwarzkopf Professional teaches under the name Foiled Cashmere™. It has two parts: precision foil placement (the brand’s 4×4 method) and layered toning, with a root tap and a finishing gloss. The result is a polished blonde, bright from the root, with soft dimension. Compared with balayage, the brightness starts at the root and regrowth shows sooner. Ratios, developer volumes and timings come from your lightener’s and your toner’s manufacturer.
What is foiled cashmere and why full foils are back?
Foiled cashmere is a full-head foiling technique that Schwarzkopf Professional presents as Foiled Cashmere™. The formula page Behind The Chair published splits it into two parts: precision lightening with what the brand calls the 4×4 method, and layered toning that softens the root and finishes with a gloss. The result is a polished blonde, bright from the root with soft dimension, inspired by Carolyn Bessette-Kennedy’s 90s blonde.
The technique was perfected by colorist Kari Hill to recreate that blonde for FX’s Love Story, and with Schwarzkopf Professional she turned it into a salon-ready method the brand now teaches, alongside Tracey Cunningham, on its online academy. The aesthetic reference is a polished blonde, with no harsh root and no highlights that read one by one.
Why now? Behind The Chair puts it down to 90s nostalgia and the understated-luxury aesthetic, after nearly a decade of lived-in color dominating salon menus. What clients ask for now is a cleaner, more “salon-polished” blonde, and that’s what foils deliver.
What changed since the 90s is what goes inside the foil. In Kari Hill’s formula, the lift is done with a Schwarzkopf bond-enforcing lightener (BLONDME Bond Enforcing Premium Lightener 9+) and the toner is a demi-permanent from the same brand (Igora Vibrance). The placement and the layered toning don’t depend on a brand; ratios and timings do: they’re set by each product.
Foiled cashmere vs cashmere blonde: they’re not the same
Cashmere blonde is a shade: creamy, neutral-warm blonde. Foiled cashmere is a technique: full-head foiling with precision placement and layered toning, one of the routes to that shade. How to formulate the shade is covered in that guide; here we stick to the technique.
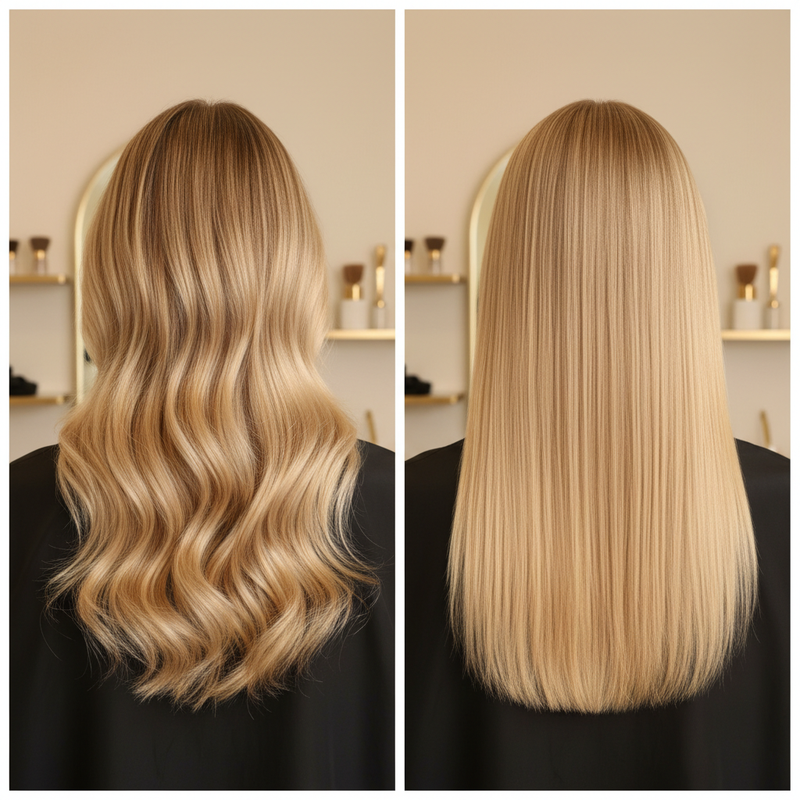
You can achieve cashmere blonde with balayage, but the result will be more organic with natural variation. Foiled cashmere aims for the opposite: a polished, controlled finish.
| Concept | Cashmere blonde | Foiled cashmere |
|---|---|---|
| What it is | A shade (creamy neutral blonde) | A technique (4×4 full foil) |
| Result | Can have natural variation | Polished, bright from the root |
| Technique | Balayage, foils, or both | Foils only (precise placement) |
| Reference | Contemporary cashmere blonde | 90s Bessette-style blonde |
| Article | Cashmere blonde | This article |
Foiled cashmere vs balayage: when should you use each?
Use foiled cashmere when the photo calls for a polished blonde that’s bright from the root, with the soft dimension that weaves inside the foils give. Choose balayage when the goal is a more organic finish, with lightener concentrated on mids and ends and a root that grows out diffused. The trade-off with foils is maintenance: because the brightness starts at the root, regrowth shows sooner and means more salon visits.
This is the key decision. Both are valid techniques, but they solve different problems. Confusing them is one of the most common mistakes. For the general comparison between the two families, see balayage vs highlights.
| Factor | Foiled cashmere (full foil) | Balayage |
|---|---|---|
| Result | Polished blonde, bright from the root | Graduated, organic blonde |
| Coverage | Root to tip inside each foil; hair between foils stays unlightened | Concentrated on mids and ends |
| Application | Weaves in foils, placed with precision | Freehand, with brushstrokes |
| Control | High: every foil has its place and weave size | Variable: depends on hand technique |
| Maintenance | More frequent: regrowth shows sooner | More spaced out: the root grows out diffused |
| Ideal for | Clients wanting a polished, “salon” blonde | Clients preferring a natural effect |
Pro tip: Talk maintenance before you open the first foil. With foils, the brightness starts at the root and regrowth shows sooner than with a blonde balayage. Foil density is your dial: Behind The Chair’s formula page increases it for a bolder look, so if the client doesn’t want to come back often, the careful move is to keep the density down.
When to recommend full foil over balayage
- The client wants a polished blonde, bright from the root, with no highlights that read one by one
- The photo calls for lightening from the root, not just mids and ends
- There’s a balayage history and the client wants a change of style (without re-lightening what’s already lightened: see the FAQ)
- The goal is a neutral, creamy blonde: the toner sets that shade, not the foil; the foil adds precision in placement
- The client wants a more polished, editorial look
When to stick with balayage
- The client prefers a natural, lived-in blonde
- They don’t want regrowth that shows early
- Maintenance budget is limited
- The goal is a dimensional blonde with depth
- The client wants the soft finish of balayage, but painted and wrapped in foil: that’s foilyage
How do you formulate foiled cashmere step by step?
Foiled cashmere works in two stages: lightening with precisely placed foils, then layered toning. Three calls are yours: the base to reach, where each foil goes and how the toner is split between root and lengths.
Pre-service assessment
Before opening a single foil, you need three data points and your pre-service tests:
- Actual natural level: Not what it looks like, what you measure. The base to reach depends on the blonde you’re after: for cashmere blonde, a clean pale yellow (level 9), as explained in our shade guide
- Color history: Previous lightening, permanent dyes, henna. Everything affects the result
- Porosity: Porous hair absorbs toner unevenly, and the polished finish of this technique depends on the toner grabbing evenly
- Allergy test: 48 hours before the oxidative toner, following its manufacturer’s instructions. How to fit it in without losing the appointment is in our 48-hour patch test guide
- Strand and elasticity test: If the hair has a history, lighten a hidden test strand first to see how it lifts and what base it reaches. If it’s already lightened, stretch it wet: if it stretches and doesn’t bounce back, today is not the day to lighten again (elasticity test)
Lightening: what the manufacturer sets and what you decide
For the mix, the developer volume and the processing time, go by the instructions for the lightener you’re using: every powder has its own. The judgment call is yours: the lowest developer that gets you to the base and, if the base is dark or the hair can’t take it, splitting the lift over two sessions rather than going up in volume. The logic of volumes and stages is in our professional bleaching guide.
Kari Hill’s formula page uses two lightener mixes: one for the back sections and another for the front and sides, which lifts more and keeps the face frame brighter.
The 4×4 placement technique
4×4 is the name Schwarzkopf Professional gives to its foil placement method for this technique. What each 4 counts isn’t spelled out in any of the open sources we cite: the full method is taught in the brand’s course. What Kari Hill’s formula page on Behind The Chair does publish, besides the two lightener mixes:
- Alternating weave sizes: dimension comes from alternating the size of your weaves throughout the head
- Foil density: for a bolder look, more foil density
And what holds for any foil, not just this method:
- Full saturation inside the foil: unlike balayage, on virgin hair what goes into each foil is covered from root to tip; if the lengths are already lightened, the lightener goes on new growth only, as we cover in the FAQ. Fold each foil neatly so the lightener doesn’t leak onto the sections left out
Pro tip: The “cashmere” finish doesn’t come from lightening the whole head evenly, but from the hair left between foils. That’s why the weaves aren’t all the same size: alternating them is what blends the brightness with the natural depth and avoids the wig effect.
Layered toning
The toner is where the result is defined, and in this technique it goes on in layers. Kari Hill’s formula page does it in three steps:
- Root tap first: a mix applied to the root area to soften the natural base and add depth
- Hairline last: the same mix, but applied to the hairline at the end, so the face frame doesn’t go too dark and keeps the glow around the skin
- Global gloss: after rinsing the root tap, a gloss from roots to ends for shine and refinement
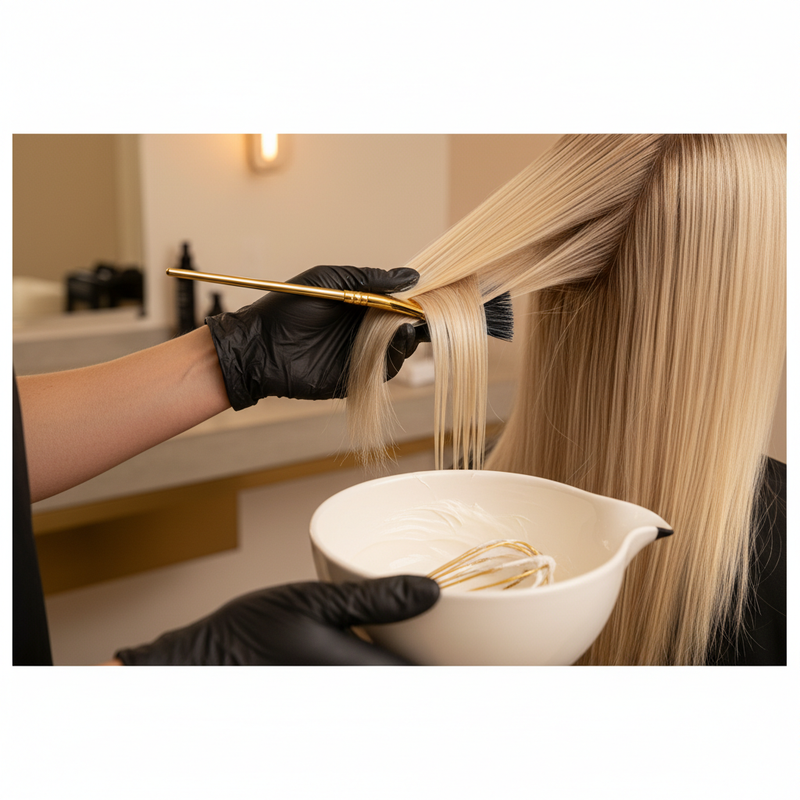
For the toner color, the logic is the same as for cashmere blonde: over the pale base, a natural with a touch of soft gold and a hint of ash to temper it. All ash reads cool; all gold reads buttery. If you need to neutralize yellow first, our guide to toner on bleached hair goes step by step.
Pro tip: If a cashmere formula asks for a “/31”, it’s written in Wella’s numbering: the Koleston Perfect usage booklet names /3 Gold and /1 Ash. In Schwarzkopf’s current English naming for Igora, the line from the brand that teaches this technique, -3 is Matte and -1 is Cendré, so the same number won’t give you a gold ash. Find the gold and the ash by name in the chart of the brand you’re mixing, not by the digit.
Finishing gloss
The global gloss is the last toning step and the one that delivers the silky shine that defines cashmere. It’s not optional: without it, you lose the cashmere signature. Apply it from roots to ends with the activator and timing set by its manufacturer; the full technique is in our hair gloss guide.
What mistakes ruin a modern full foil?
The five mistakes that do the most damage to a modern full foil: weaves that are too thick (you lose the soft dimension), a toner copied by number from another chart or all ash (it reads cool instead of cashmere), skipping the root tap or the finishing gloss, opening every foil at once without looking at the order they went in, and painting freehand inside the foil instead of saturating root to tip.
-
Weaves too thick: With thick weaves, each foil reads as a stripe and you lose the blended finish that gives the technique its name. If you want more impact, build it with more foils rather than thicker weaves
-
Toner copied by number or too ashy: If the toner is all ash, the result is a cool blonde, not cashmere. And if you copy a Wella /31 into another chart, you can end up with a matte: the toning section above explains why
-
Skipping the root tap or the gloss: Without the root tap, the step from natural base to foils looks harsh; without the gloss, the blonde looks matte and loses the cashmere signature
-
Opening every foil at once: The first foils you placed have more processing time than the last ones. If you check them all at the same moment, you may find level differences between zones. Check zone by zone, in the order you applied, and if one zone is slower to lift, start there next time
-
Applying with balayage technique: Foiled cashmere is NOT balayage inside foils. The hair that goes into each foil gets full saturation: root to tip on virgin hair and, if the lengths are already lightened, on new growth only. Painting freehand inside a foil costs you precision
Frequently asked questions
Does full foil damage hair more than balayage?
Not necessarily. Damage depends more on developer strength, processing time and hair history than on the technique itself. What changes with foils is that the lightener goes on from the root, so the tests matter as much or more: an allergy test 48 hours before the oxidative toner, per its manufacturer; a strand test if the hair has a history; and, if it’s already lightened, an elasticity test before lightening it again.
How much does a foiled cashmere service cost?
Behind The Chair pitches it as a high-ticket service with frequent visits, but the actual figure moves with length, starting level, number of sessions and your market. Working it out from your chair time, product and margin is what our hair color pricing guide is for.
Can I do foiled cashmere over previous balayage?
Yes, with caution. What the balayage already lightened shouldn’t get lightener again: apply it only to virgin hair (mostly the regrowth) and keep it off what’s already lightened, which is where breakage lines and snapping show up. We cover it in banding after a bleach root touch-up. Before that, run an elasticity test on the lightened lengths: if they stretch and don’t bounce back, today is not the day to lighten. The layered toning pulls everything together at the end.
How often does foiled cashmere need retouching?
Every head keeps its own calendar. Behind The Chair’s formula page frames it as a service clients return to every 4 to 6 weeks; the real pace depends on the contrast between the natural base and the blonde, the foil density and how much regrowth the client is happy to see. Unlike balayage (which diffuses the root), foils create a more defined line as hair grows. The retouch uses the same placement, with lightener on new growth only. To refresh the tone between retouches, see the maintenance section of our cashmere blonde guide.
Key takeaways
- Foiled cashmere is the full-head foiling technique behind a polished, 90s-inspired blonde; Schwarzkopf Professional teaches it as Foiled Cashmere™
- The difference from balayage: brightness starts at the root and the finish is more polished; in exchange, regrowth shows sooner. Each has its place
- The technical key is precision placement with alternating weave sizes, plus layered toning: root tap and gloss
- Read the toner by name in your brand’s chart, not by another brand’s number
- Before the lightener: allergy test 48 hours before the toner, strand test and elasticity
Calculate professional formulas with AI
Want to generate personalized formulas for full foil and cashmere toning based on each client’s starting level? Use the developer mix calculator to get exact lightener-to-developer ratios for every starting point.
Try Blendsor - Permanent Free plan. No commitment.
What's the difference between foiled cashmere and a regular balayage?
In the app, we ask you a question like this one, but about your own client.
Up for this week’s case? → More on highlights and techniques →Related articles
Practice with our colorimetry tools
Calculators, neutralization wheel, AI consultation...
The Blendsor newsletter
Color techniques and trends for professionals. No spam.
A client in the chair right now?
The Blendsor advisor gives you the precise formula for this technique with your salon's brands — and saves it to your client's card.
Ask about your caseWritten by the Blendsor team
Professional hair colorimetry experts with experience in AI-assisted formulation. We combine color science, salon practice and technology to help colorists formulate with precision.