Hair Bleaching Stages & Time Chart: Pro Step-by-Step Guide
Professional hair bleaching stages by level from Wella's lightening curve, how long to leave bleach on and when to stop, and the whole process step by step.
Blendsor
Blendsor Team
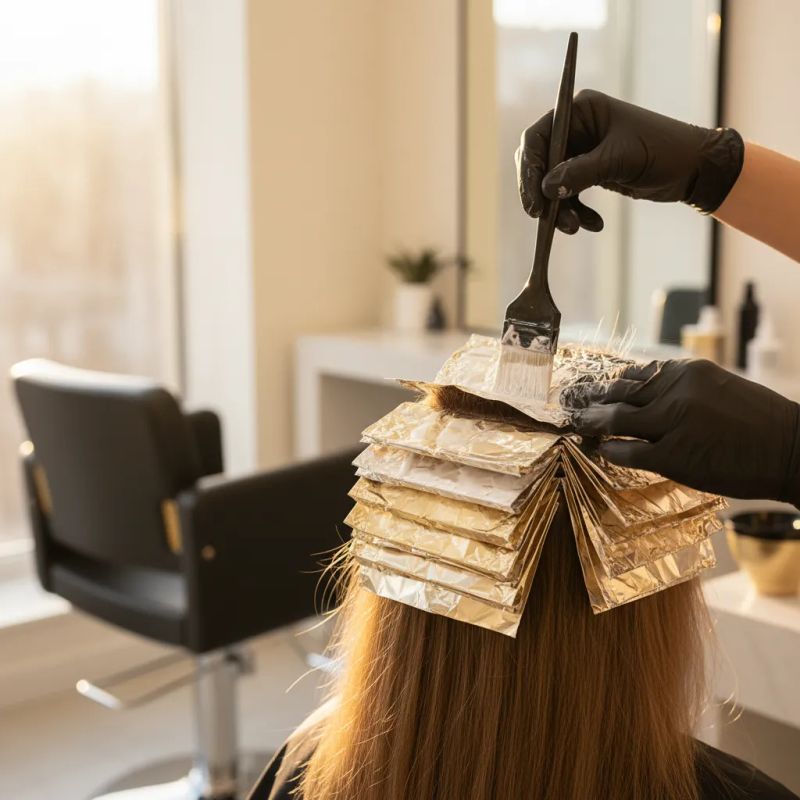
How many times has this happened to you? Your client wants spectacular platinum blonde and you end up with straw-like, elastic hair or, worse, breakage. Bleaching is one of the most requested techniques and, at the same time, one that demands the most respect.
Professional hair bleaching consists of removing natural hair pigment (melanin) through an oxidative chemical process, allowing you to achieve light tones that dye alone cannot achieve. But here’s the key: it’s not about how much you lighten, but how you do it.
If you master the lifting stages, timing, and the right products, you can achieve flawless blondes while maintaining hair integrity. In this guide we’ll see exactly how to do it.
This article is part of our complete guide to professional coloring techniques, where you’ll find the context for all lightening techniques.
Quick summary: Professional bleaching removes melanin through three phases (cuticle opening, hydrogen peroxide penetration and melanin oxidation), and the melanin it removes doesn’t come back. The stages are the underlying pigments that show up as you lift: on Wella’s lightening curve, from the black of level 2 to the very pale yellow of level 10. The maximum time is set by each lightener’s instructions (for Blondor, 50 minutes) and the moment to rinse, by the base you see when you check. On the scalp, Blondor allows no developer stronger than 6% (20 vol). On virgin hair, the root goes on last. And if an oxidative toner follows, its allergy test is done 48 hours beforehand. Bleaching is the canvas, toner is the finish.
What Is Bleaching and How Does It Work?
Bleaching oxidizes and dissolves melanin through three phases: cuticle opening (an alkalizer such as ammonia raises the pH and lifts the cuticle scales), hydrogen peroxide penetration into the cortex, and melanin oxidation until pigments become colorless. The process is irreversible: removed melanin does not return. Unlike dye, bleach only removes color; it deposits nothing. How far it lifts is something each manufacturer states for its own product. Wella’s US pro store sells Blondor Multi Blonde powder “for up to 7 levels of lift, even on pre-colored hair”, the same ceiling its Blondor usage booklet gives the range. On Wella’s Spanish Koleston Perfect chart, the Special Blonde high-lift shades, mixed 1:2 with 12% developer, are marked for 4-5 levels (“Para 4-5 tonos más claro”). Those are the product’s ceilings. The hair in front of you may stop short of them, and the strand test shows you where.
Dye is a different tool: it deposits pigment, and it lifts only as far as its own chart states.
The Chemical Process
The chemistry explains it: bleaching works in three phases:
- Cuticle opening: Ammonia or alkaline substitutes raise the hair’s pH and open the protective scales
- Penetration: Hydrogen peroxide enters the hair cortex
- Melanin oxidation: Natural pigments break down and become colorless
This process is irreversible. Once you remove melanin, it doesn’t come back. That’s why precision in each step is fundamental.
Difference Between Bleaching and Lightening with Dye
| Aspect | Bleaching | Lightening dye |
|---|---|---|
| Lifting power | Whatever each lightener states (Blondor Multi Blonde: up to 7 levels) | Whatever each line states (Koleston Special Blonde with 12%: 4-5 levels) |
| Deposits pigment | No | Yes |
| Potential damage | Higher | Lower |
| Control | More difficult | Easier |
| Uses | Extreme blondes, base for fashion colors | Moderate changes |
Pro tip: If the lift you need fits within what a high-lift dye states, consider it before reaching for bleach: it lifts and deposits color in one step, with less potential damage.
What Are the Bleaching Stages and How Do You Read Them?
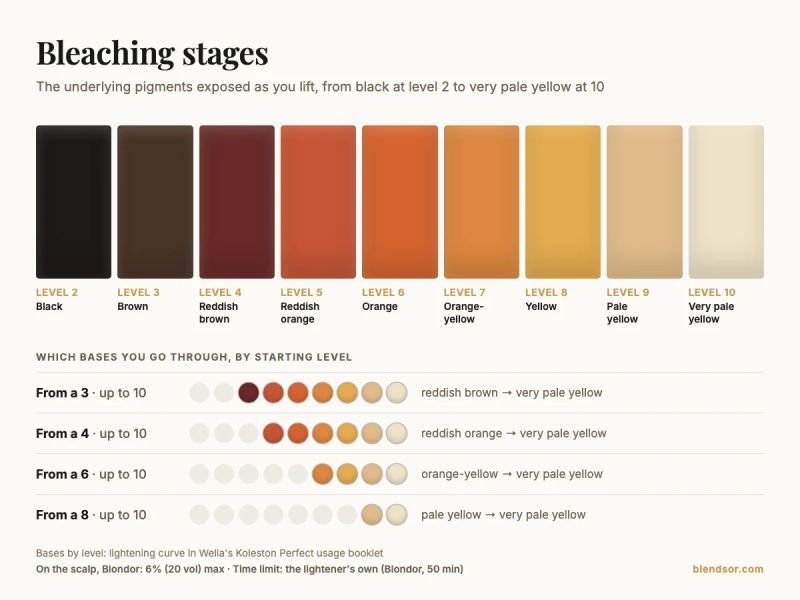
The bleaching stages are the underlying pigments the hair exposes as it lifts. Wella names them on the lightening curve in its Koleston Perfect usage guidelines, a hair color guide that labels the curve “Exposure of underlying pigments during the coloring process”. The curve starts at the black of level 2, runs through the orange of level 6 and the yellow of level 8, and ends at the very pale yellow of level 10. The hair’s starting level decides how many stages you go through: you begin on its row of the chart and pass through each row above it until you reach the target level. Knowing the stages lets you predict the outcome, stop at the right moment, and choose the correct toner for the resulting underlying pigment.
Understanding bleaching stages is fundamental for predicting results and knowing when to stop. The order of those bases comes from the melanin itself. Schwarzkopf’s IGORA ROYAL technical manual for Spain (p. 27) describes pheomelanin shifting “de rojo a naranja, después al amarillo” (from red to orange, then to yellow) before it dissolves, and, because the brown-black eumelanin dissolves more easily, pheomelanin shows up most strongly in the final phases of lightening.
Stage Chart by Level
| Level | Underlying pigment exposed (Koleston Perfect lightening curve) |
|---|---|
| 2 | Black |
| 3 | Brown |
| 4 | Reddish brown |
| 5 | Reddish orange |
| 6 | Orange |
| 7 | Orange-yellow |
| 8 | Yellow |
| 9 | Pale yellow |
| 10 | Very pale yellow |
Why Knowing the Stages Matters
When someone with level 4 brown hair asks for platinum and that platinum is a 10, the chart shows you the whole journey: reddish orange at 5, orange at 6, orange-yellow at 7, yellow at 8, pale yellow at 9 and very pale yellow at 10. That’s six bases above the starting point, and the curve doesn’t tell you how many of them that hair can take in one session: the strand test does.
Knowing these stages allows you to:
- Predict which base you’ll find when you rinse
- Stop at the right moment without over-processing
- Choose the right toner for the resulting undertone. Wella says it right next to its curve: to neutralize the exposed underlying pigment, red/orange or yellow, “choose the complimentary color that is opposite on the color wheel”
- Manage expectations with your client
To better understand underlying pigments, check out our basic colorimetry guide. How to read each level is in the color level guide, and why the base leans warm is covered in residual pigment in bleached hair.
What Products Do You Need for Professional Bleaching?
The three bleach formats are: powder (greatest lifting power, use for highlights/balayage/global), cream (more moisturizing, less power, ideal for delicate areas and sensitive hair) and oil (very gentle, with more limited lift set by its instructions, fragile hair). Developer volumes depend on where the mix goes: on the scalp, Blondor allows up to 6% (20 vol); 9% (30 vol) and 12% (40 vol) are for techniques away from the scalp. Bond builders go into the bowl to protect the hair’s disulfide bonds while you lift, at the dose each brand publishes.
Types of Bleach
Powder Bleach (Most Common)
- Advantages: Greater lifting power, versatile
- Disadvantages: Can be drying, requires monitoring
- Use: Highlights, balayage, global bleaching
Cream Bleach
- Advantages: More moisturizing, easier to control
- Disadvantages: Less lifting power
- Use: Delicate areas, touch-ups, sensitive hair
Oil Bleach
- Advantages: Very gentle, good hydration
- Disadvantages: More limited lift (its instructions set the maximum)
- Use: Subtle highlights, fragile hair
Developers for Bleaching
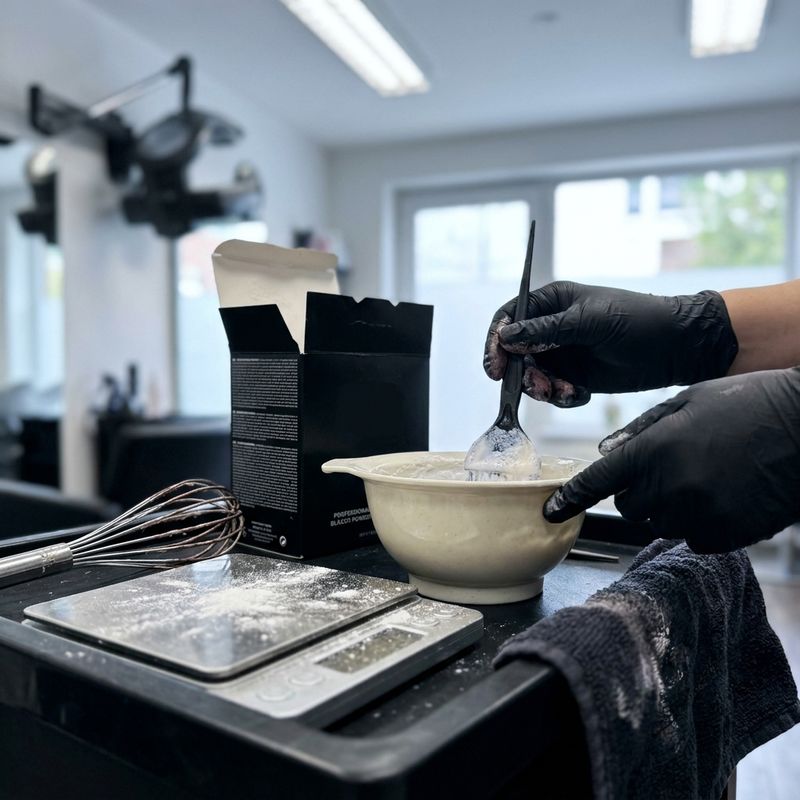
The choice of developer is critical. More volume doesn’t mean better results, and not every volume belongs in every zone. The Blondor booklet splits it this way: Welloxon Perfect 6% for regrowth, and “Welloxon Perfect 6%, 9%, or 12%” for techniques away from the scalp. And the Blondor Multi Blonde page on Wella’s Spanish pro store adds a warning for the skin: don’t use it if the scalp is sensitive, irritated or damaged (“No utilice el producto si el cuero cabelludo está sensible, irritado o dañado”).
| Volume | Bleaching Use | Precautions |
|---|---|---|
| 20 vol (6%) | Roots and anything touching the scalp: the most Blondor allows there | Slower: check frequently |
| 30 vol (9%) | Highlights, balayage and techniques away from the scalp | Not on the scalp |
| 40 vol (12%) | Techniques away from the scalp, on resistant hair | Not on the scalp, and not on porous hair without a strand test |
For more on developers, review our developer volumes guide.
Pro tip: Before reaching for a higher volume to save time, check which zone it’s going on and what the strand test showed. A clean blonde comes from reading the base well at every check.
Additives and Protectors
Bond builders (like Olaplex, Fibreplex, Smartbond) go into the lightener bowl, and each brand publishes its own dose. Olaplex’s depends on the grams of lightener and on the technique, and it’s all laid out in bond builder dosage for lightener. With a bond builder in the bowl, you don’t bump the developer to compensate.
When they make the most sense:
- Long lifts or many levels of lift
- On previously treated hair
- In techniques requiring long exposure times
How Do You Bleach Hair Safely Step by Step?
The protocol has five phases: diagnosis (chemical history, porosity, strand test and, if the hair is already lightened, elasticity), preparation (powder and developer at the ratio the lightener’s instructions set, bond builder measured to its brand’s dose, creamy yogurt consistency), sectioning into 4 quadrants starting at the nape, applying mid-lengths and ends first and the root last (it processes sooner because of scalp heat), and monitoring: check frequently and rinse when you reach the target base, without going past the lightener’s time limit.
Picture someone who comes in after trying to go platinum at home on level 5 light brown hair: 40 vol, no bond builder and 90 minutes of processing, far beyond the 50 minutes Wella sets as the limit for its Blondor. The result: intense orange in the mid-lengths, roots lighter than the rest, and elastic ends that broke at the slightest touch. Lightening could only continue once the strand test and the elasticity test said the hair was ready. This case shows why each step of the protocol exists.
Before Starting: The Diagnosis
Never apply bleach without evaluating:
- Chemical history: Previous dyes? Relaxers? Henna?
- Cuticle condition: High, medium or low porosity?
- Strand test, using the same mix you’ll put on the head: whenever the hair has a history (previous lightening, highlights, dye, henna), and on virgin hair too when you’re lifting many levels in one session. It tells you how far it lifts and what condition the hair comes out in. How to do it: the strand test
- Elasticity: if the hair is already lightened, or has a relaxer or perm in its history, check it on that same strand. If it stretches and springs back, you can go ahead; if it stays stretched or snaps, that hair isn’t ready to lift today. Learn how to assess it with the hair elasticity test
Product Preparation
Ratio: the lightener’s instructions set it. In Wella’s lightening guide, Blondor powders go from 1:1.5 to 1:2 (one part powder to one and a half or two parts developer).
Example at 1:2, on the scalp:
- 60g bleach powder
- 120ml 6% (20 vol) developer, the most Blondor allows there
- Bond builder: the dose its brand publishes
Olaplex’s dose, by grams of powder and by technique, is in the bond builder dosage article: don’t eyeball it.
Ideal consistency: Like creamy yogurt. If it’s too runny, it drips and stains. If it’s too thick, it doesn’t penetrate well.
Application Step by Step
1. Section Correctly
Divide hair into 4 quadrants:
- Lower nape
- Upper nape
- Sides
- Crown
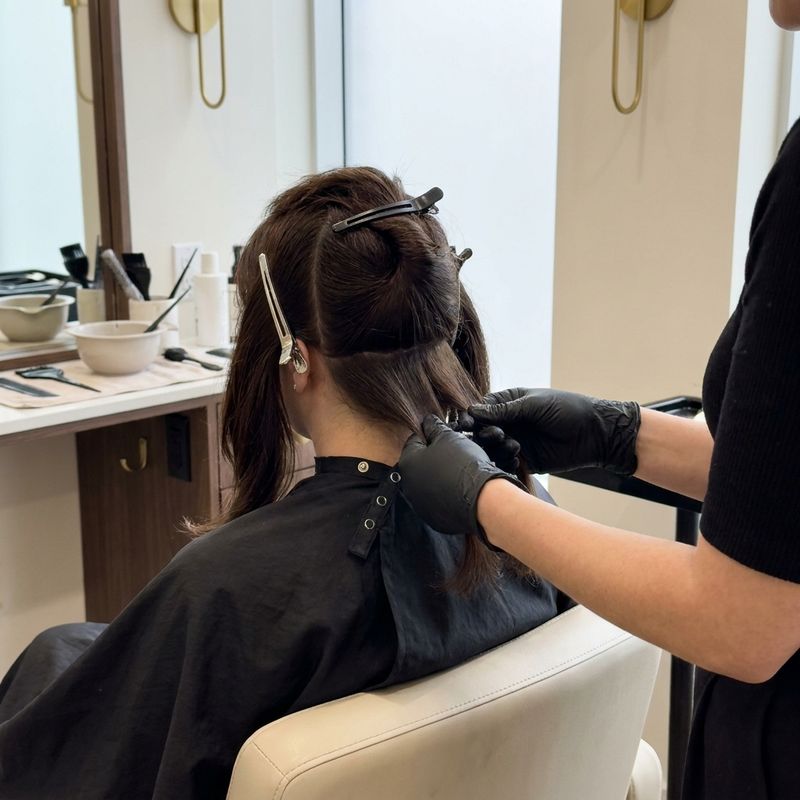
Start at the nape: it tends to be the area that resists lightening most, so it gets the most time.
2. Apply Mid-Lengths to Ends First
The root processes sooner than the rest because of scalp heat. By applying to mid-lengths and ends first, by the time you get to the roots the lift comes out even.
Sequence on virgin hair:
- Mid-lengths and ends on the entire head
- Watch how they progress: when they get close to the base you’re after, move to the root
- Apply to the roots, which catch up with the lengths thanks to scalp heat
On a retouch it works the other way round: product goes only on the new growth and never on what’s already lightened. How to avoid a band: banding on a bleach root touch-up.
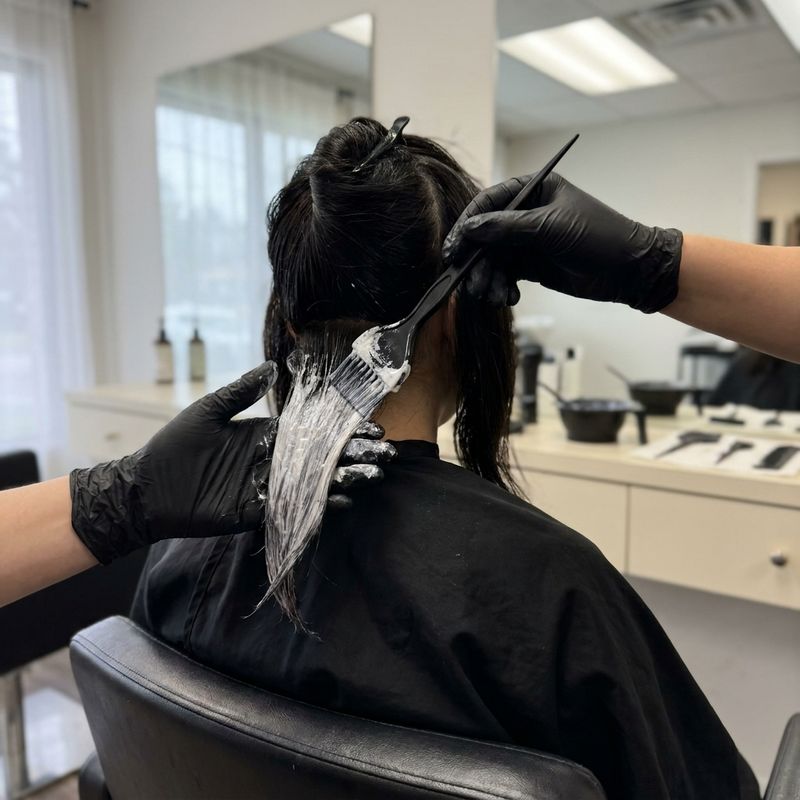
3. Saturation Technique
- Enough product: Hair should be completely covered
- Don’t compress: Don’t crush the hair with the product
- Separation: Use foil or plastic between sections if necessary
4. How Long to Leave Bleach On: Time and Temperature Control
How long you leave bleach on comes down to two things: the maximum time, set by the lightener’s instructions, and the real time, set by the base you see when you check. For its Blondor powders, Wella’s lightening product guide (US edition) puts it in one line: “Do not exceed 50 mins. Check frequently until desired lightening is achieved.” It adds that development time depends on the condition of the hair, its porosity and the lightening result you want. With 20 vol or 30 vol the rule is the same: the bleach stays on until the strand reaches the base of your target level, without going past that limit. What volume changes is how far the mix lifts and, above all, where you can put it: on the scalp, the same guide allows no more than 6% (20 vol).
Scalp heat speeds up the roots for two reasons Wella gives in its guide to hot roots: the roots “benefit from the warmth of your client’s scalp”, which can make the formula process faster, and new growth hasn’t fully keratinized yet. So when you lighten root to tip, it recommends “applying hair lightener to the root area last”. There’s no set minute for the root to go on: you apply it when the lengths are close to the base you want, so both arrive together.
If the root still comes out different from the lengths, the same Wella guide has a fix for each case. Lighter and brighter than the rest? A darker toner on the root area only blends it in. And if it stayed warm because the lightener wasn’t on it long enough, you lift it to the correct underlying level first and then tone. That pass goes on the root only, without touching what’s already lightened, and if the scalp has been left sensitive or irritated, it waits for another day.
Time chart: what to look at to decide when to stop
| What to look at | What it tells you | What you do |
|---|---|---|
| The lightener’s time limit | That product’s maximum time (Blondor: 50 minutes) | You don’t go past it, whether or not you’ve reached the base |
| The base of each strand, against the stage chart | Whether you’re at the base of your target level | You rinse right then |
| Virgin root against the lengths | The root processes sooner because of scalp heat | You apply it last and watch it more closely |
| Foil | It holds heat and can speed up the lift | You open and check more often |
| Porous or already lightened areas | Blondor notes that development depends on depth of color and porosity | If they were already lightened, you don’t put product on them |
Warning: The limit doesn’t stretch. If you reach the lightener’s maximum and the base hasn’t lifted enough, you rinse anyway and decide on clean hair: a new session later, or neutralizing the base where it is (see relift or neutralize the bleach base). And at the root, Blondor’s developer stays at 6% (20 vol): 9% and 12% are for techniques away from the scalp.
Removal and Post-Care
- Emulsify: Add water to the bleach and massage gently
- Rinse with warm water: Not hot, it irritates the scalp
- Gentle shampoo: Post-bleach specific if possible
- Conditioner or mask: Restore moisture (what each mask says it repairs)
- Evaluate the result: Did you reach the desired level?
How Does the Technique Vary by Bleaching Service Type?
There are four modalities: global bleaching (uniformity across all sections, most technically demanding), foil highlights (foil holds heat, so check more often), balayage and open techniques (no foil, thicker consistency to prevent dripping), and staged multi-session bleaching (for very dark or damaged hair, with the strand test and the elasticity test deciding when to go again).
Global Bleaching
For complete color changes. The most technically demanding.
Key: Uniformity. All sections must lighten equally.
Foil Highlights
Aluminum foil holds heat and can speed up the process. To master this technique, check the highlights section in our coloring techniques guide.
Key: Open and check more often than with an open technique.
Balayage and Open Techniques
Without foil, the product works at room temperature.
Key: Thicker consistency so it doesn’t drip. Work toward the thick end of the ratio your lightener allows, or use a cream lightener.
Staged Bleaching (Multiple Sessions)
For very dark or damaged hair that can’t reach the desired level in one session.
Protocol:
- First session: lighten as far as the hair allows, within the lightener’s time limit
- Between sessions: reconstructive treatments and, before going again, a strand test and an elasticity test. Neither the Blondor booklet nor Wella’s lightening guide sets a gap between sessions: the hair does
- Second session: take only the areas that fell short to the final level, again within the time limit
What Are the Most Common Bleaching Mistakes?
The five most common mistakes are: starting at the roots on virgin hair (they lighten faster due to scalp heat, resulting in roots lighter than mid-lengths), applying insufficient product (uneven lift across sections), not monitoring the process (over-processing and breakage), using the same developer volume for all zones (more than 6% on the scalp), and ignoring chemical history (previous dye can react unpredictably with bleach).
1. Starting at the Roots
The problem: On virgin hair, roots lighten faster due to scalp heat. If you start there, you’ll have lighter roots than mid-lengths.
The solution: Mid-lengths and ends first; the root last, once the lengths are close to the target base. On a retouch, only the new growth gets product.
2. Insufficient Product
The problem: Hair isn’t completely covered and lifting is uneven.
The solution: More product than you think you need. The bleach shouldn’t “disappear” absorbed by the hair.
3. Not Monitoring the Process
The problem: You leave the product working and come back late. Over-processing, damage, breakage.
The solution: Set a timer so you never lose track of the lightener’s limit, and check often how the lift is progressing in each section.
4. Same Developer for Everything
The problem: Using 40 vol on scalp or already porous hair. The scalp is the most delicate part of the service.
The solution: Adapt the volume to each area. On the scalp, Wella’s Blondor guide goes no higher than 6% (20 vol). Away from the skin, the Blondor booklet also covers 9% and 12%, and the strand test decides which. On porous ends, the lowest volume that gives you the lift you need.
5. Ignoring History
The problem: On hair with previous dye, bleach can give unpredictable results.
The solution: Always ask, and do a strand test whenever there’s a history. If you suspect metals, read metals in hair bleaching first.
What Toning Does Hair Need After Bleaching?
Toning depends on the resulting underlying pigment, and the Koleston curve tells you which one you have at each level: pale yellow at 9 and very pale yellow at 10 → violet toner for cool blondes; yellow at 8 → violet (the /6 Wella’s hot-roots guide gives for yellow); orange-yellow at 7 → more lift if the target is lighter, or a toner with blue and violet if you stay there. How long each toner lasts depends on the product. Never apply toner without knowing the exact underlying pigment: the same formula gives very different results on pale yellow and on orange.
Bleaching is rarely the final step. You almost always need to tone to get the desired shade. And if that toner is oxidative (a demi-permanent mixed with developer, or a permanent color), it needs its own allergy test 48 hours beforehand, as its manufacturer’s instructions require. In the Koleston Perfect usage booklet, Wella’s wording is: “we recommend that a skin allergy test is done 48 hours before coloring.” Since that’s two days, it gets booked at the consultation, not on bleaching day. How to fit it into the schedule: scheduling the 48-hour allergy test.
When to Tone
- Pale yellow undertone (level 9-10): Violet toner for cool blondes
- Yellow undertone (level 8): Violet (in Wella’s hot roots guide, the /6 for yellow)
- Orange-yellow undertone (level 7): More lift, or a toner with blue and violet (the /86 that same guide gives for orangey yellow)
To choose the exact toner based on the underlying pigment, use our toner selector. Our toner on bleached hair guide covers the full post-bleach toning process step by step.
Toning Products
| Type | Power | Before you apply it | Use |
|---|---|---|---|
| Toner with developer | Medium | Allergy test 48 h beforehand | Subtle changes |
| Semi-permanent dye | High | Check its instructions: if it’s mixed with developer, allergy test too | Specific tones |
| Direct pigment | Variable | Whatever its instructions ask | Fashion colors, corrections |
To master neutralization, review our colorimetry guide and the specific article on how to neutralize unwanted tones.
How Do You Maintain Bleached Hair After the Service?
In-salon maintenance includes reconstructive treatments when the hair calls for them, root touch-ups only in the regrowth zone, and maintenance toning to preserve the shade. At-home recommendations for clients: sulfate-free shampoo, a moisturizing mask on a regular basis, heat protectant always, and, for cool blondes, purple shampoo when yellow starts to creep back. Proper hydration between sessions determines how long the result stays vibrant.
In Salon
- Reconstructive treatments: When elasticity or porosity calls for them, not by the calendar
- Root touch-ups: Only the growth area. Wella’s Blondor guide spells it out: “Do not overlap previously lightened hair with product”
- Maintenance toning: To preserve the tone
At Home (Client Recommendations)
- Sulfate-free shampoo
- Moisturizing mask on a regular basis
- Heat protectant always (what to check before buying one)
- Purple shampoo when yellow starts to show (if cool blonde)
Frequently Asked Questions
How Many Levels Can I Lift in One Session?
What each lightener states is its maximum: Wella sells its Blondor Multi Blonde powder “for up to 7 levels of lift”. What the hair in front of you can take today is what the strand test and, if the hair is already lightened, the elasticity test tell you. If hair has chemical history or is damaged, the prudent move is to spread the lift over several sessions. Hair health is always a priority over immediate results.
Can I Bleach Hair Dyed Dark?
Yes, but with precautions. When layers of oxidative dye have built up, lifting can run slower and patchier than on a natural base of the same level, and you’ll often need more time and several sessions. Always do a strand test first, so you see how that dye responds to bleach before it goes on the whole head. If it’s box black, what to check before you lift is in oxidation diagnosis before bleaching box black.
How Long Should Pass Between Bleaching Sessions?
There’s no gap that fits every head: neither the Blondor booklet nor Wella’s lightening guide sets one. The hair decides when to go again. Before each new session, repeat the strand test and the elasticity test: if the strand stretches and doesn’t spring back, or snaps, it isn’t time yet. How many bleach sessions hair can take has no set number either: it depends on its history and on how each test comes out. What does extend its life is not re-lightening what’s already lightened. Wella recommends it for blonde root touch-ups: “focus your hair lightener on the root area only, so you’re not lifting fragile ends every time your client visits the salon.”
Why Does Hair Turn Orange Instead of Blonde?
Orange is a natural stage of the bleaching process: on the Koleston curve it’s the base at level 6. It appears because you removed part of the melanin, but not all of it. If the goal was blonde and it stayed orange, it needs more lift: more time if you’re still under the lightener’s limit, or a new session if you’ve already reached it. Never try to “cover” orange with blonde dye: it comes out muddy or dull, because the orange base is still under the pigment. What to do in each case: orange hair after bleaching.
Is It Safe to Bleach at Home?
Professional bleaching requires technical knowledge, quality products and constant monitoring. Home kits have significant limitations and the margin of error is high. For safe and predictable results, it’s always best to see a professional.
Recommended Products for Professional Bleaching
These are products worth knowing for safe bleaching with predictable results:
- Olaplex No.1 + No.2: the reference for bond protection. Dose No.1 by grams of lightener and by technique, as Olaplex publishes it (bond builder dosage).
- Schwarzkopf BlondMe Premium Lightener: high-performance bleach powder. Schwarzkopf lists its Premium Lightener 9+ at “up to 9 levels of lift”, with built-in neutralization.
- Schwarzkopf Fibreplex: Schwarzkopf’s alternative to Olaplex. Weigh it out to Schwarzkopf’s dose, not Olaplex’s.
- Wella BlondorPlex: bleach powder with built-in bond protection. Less dust, easier to mix. When switching between toner brands after bleaching, check equivalences with our hair color brand converter.
- L’Oreal Platinium Plus: lightening paste rather than powder; L’Oréal specifies which techniques and developers it works with.
This article contains affiliate links. If you purchase through them, we receive a small commission at no additional cost to you. We only recommend products that trusted professionals endorse.
In Summary
Professional bleaching is based on these principles:
- Diagnosis first: chemical history, porosity, strand test and, if the hair is already lightened, elasticity
- Predictable stages: the Koleston curve gives the base at each level, from the black of level 2 to the very pale yellow of level 10
- Time: the lightener’s instructions set the limit (Blondor: 50 minutes); the base you see when you check tells you when to rinse
- Developer by zone: on the scalp, Blondor stays at 6% (20 vol); 9% and 12% only away from the skin
- Constant monitoring: check frequently, strand by strand
- Final toning: Bleaching is the canvas, toner is the finish, and an oxidative toner comes with its allergy test 48 hours beforehand
Mastering bleaching opens the doors to the most requested services in the salon. But it requires practice, patience and absolute respect for hair integrity.
Want personalized bleaching formulas based on your client’s hair? Try Blendsor. The AI analyzes hair condition and suggests the optimal lightening protocol.
Why does bleaching move through stages of color?
In the app, we ask you a question like this one, but about your own client.
Up for this week’s case? → More on blondes and lightening →Related articles
Practice with our colorimetry tools
Calculators, neutralization wheel, AI consultation...
The Blendsor newsletter
Color techniques and trends for professionals. No spam.
A client in the chair right now?
The Blendsor advisor gives you the precise formula for this technique with your salon's brands — and saves it to your client's card.
Ask about your caseWritten by the Blendsor team
Professional hair colorimetry experts with experience in AI-assisted formulation. We combine color science, salon practice and technology to help colorists formulate with precision.